What exactly are LUTs?
Perhaps you’ve heard the term before but aren’t really sure what it all means? So what exactly are LUTs, especially in regard to photography? Well, a LUT [Pronounced as Loot] is short for a Lookup table. It is basically a colour grading tool, that takes a conversion profile that takes predefined colour values and applies these to your images. In a way, it’s a little like a Look or Preset, but it goes further than that.
How are LUTs helpful?
A photographer can save loads of time by applying the same LUTs or collection of LUTs to their images. Instead of individual edits to your images, you can apply the same LUTs to colour grade all your images. Giving a cohesive feel to a series. In Photoshop you can even set them up as Actions.
Where can you find LUTs
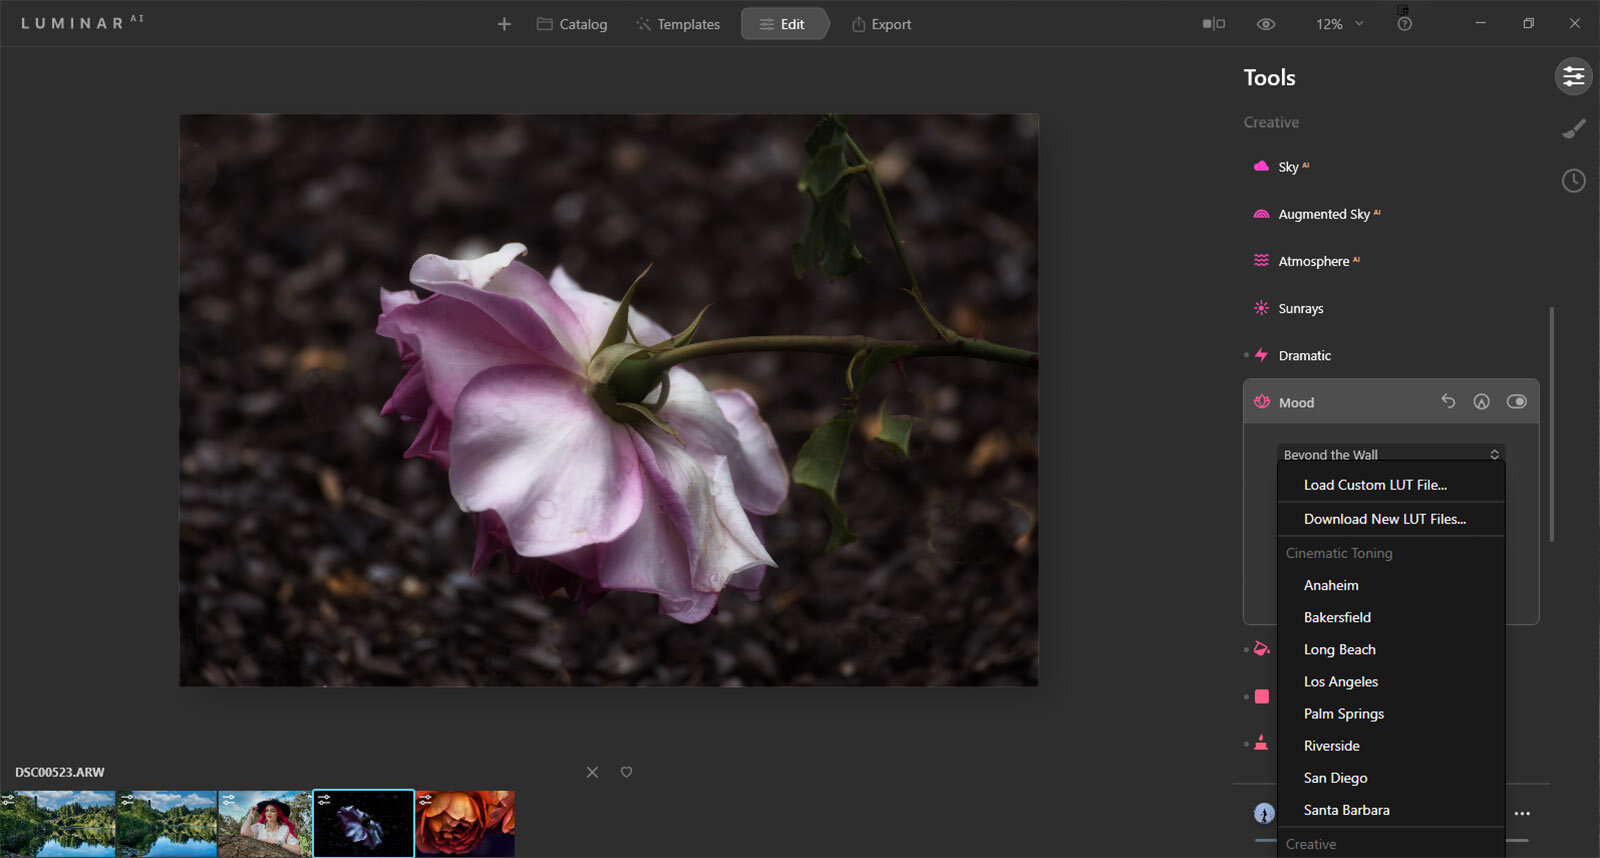
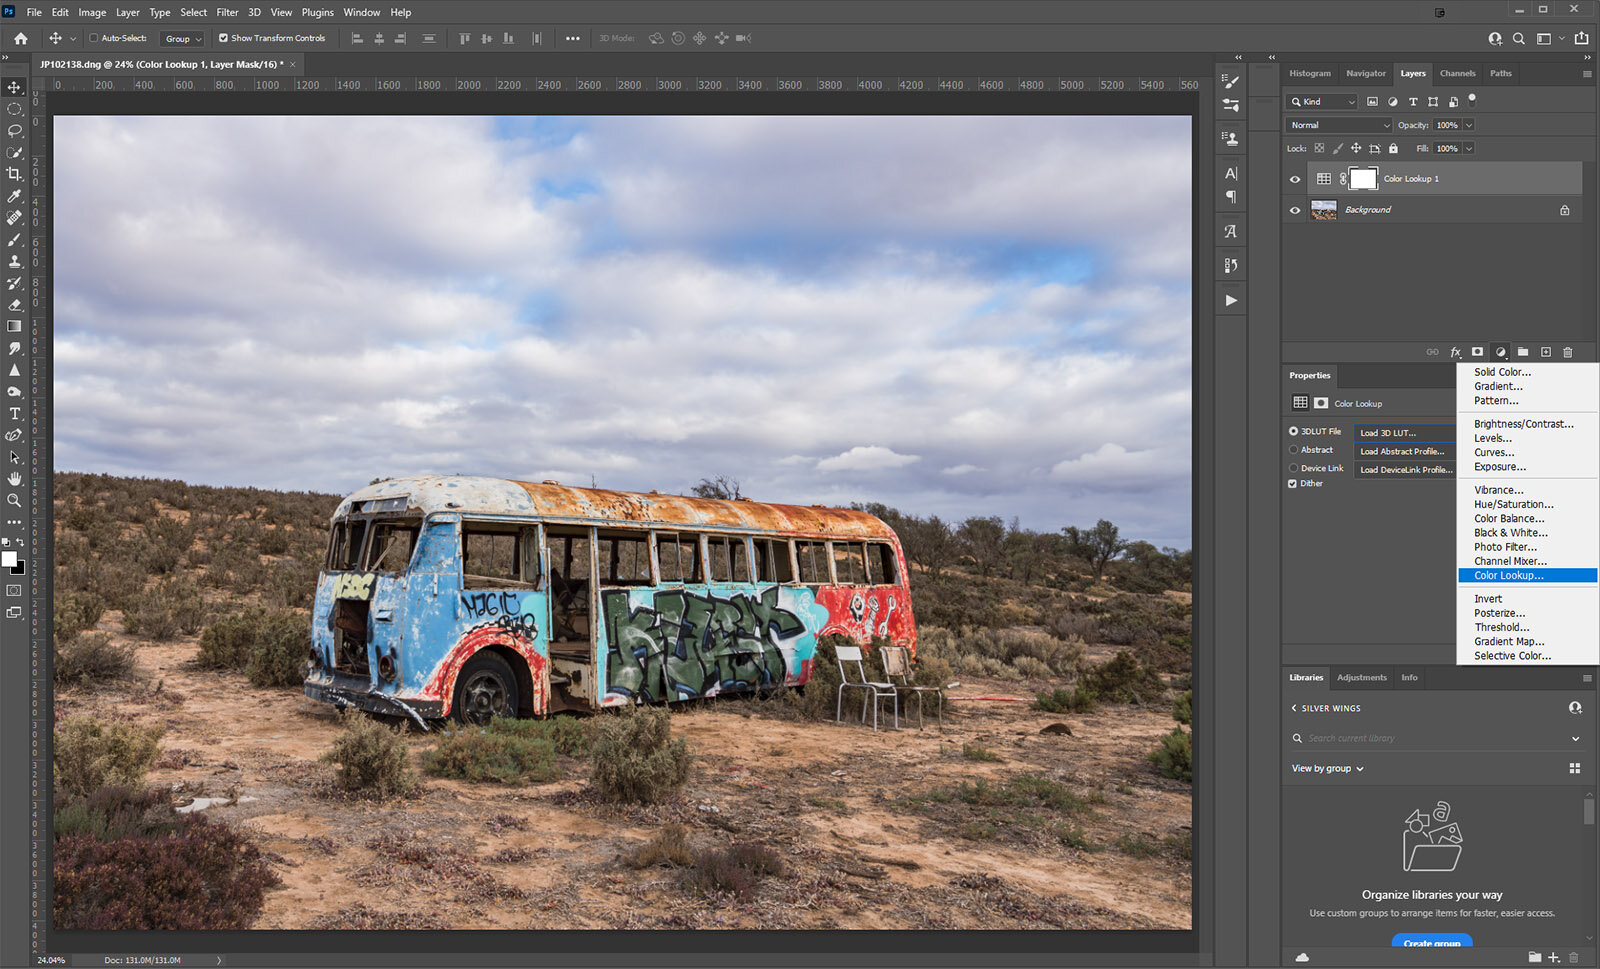
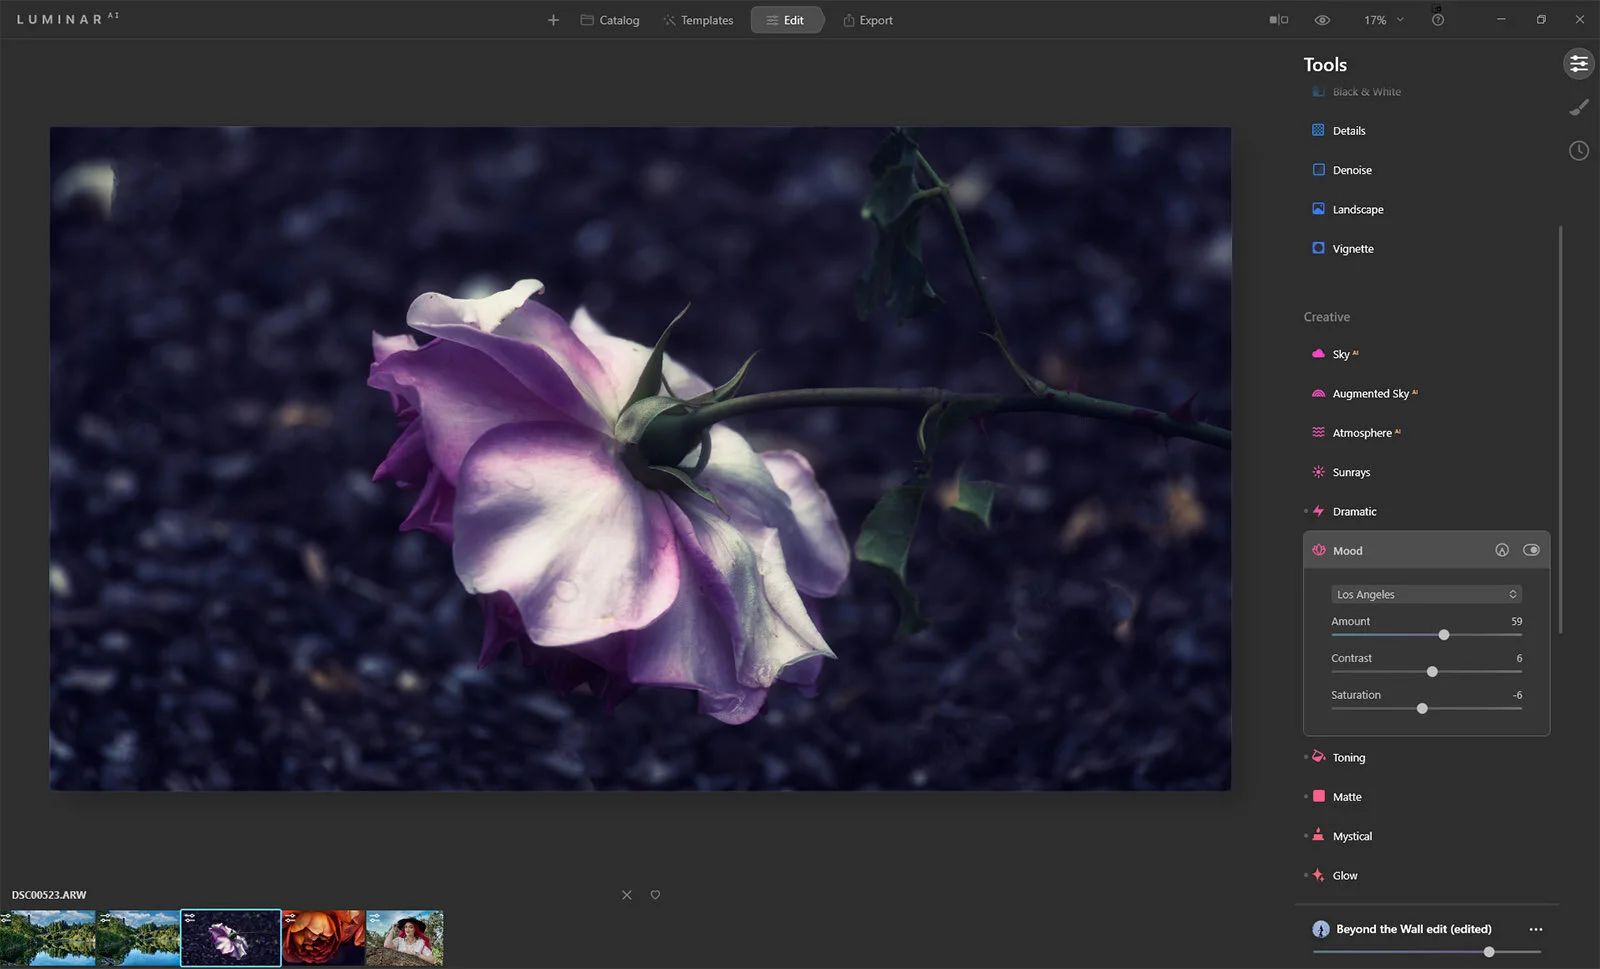
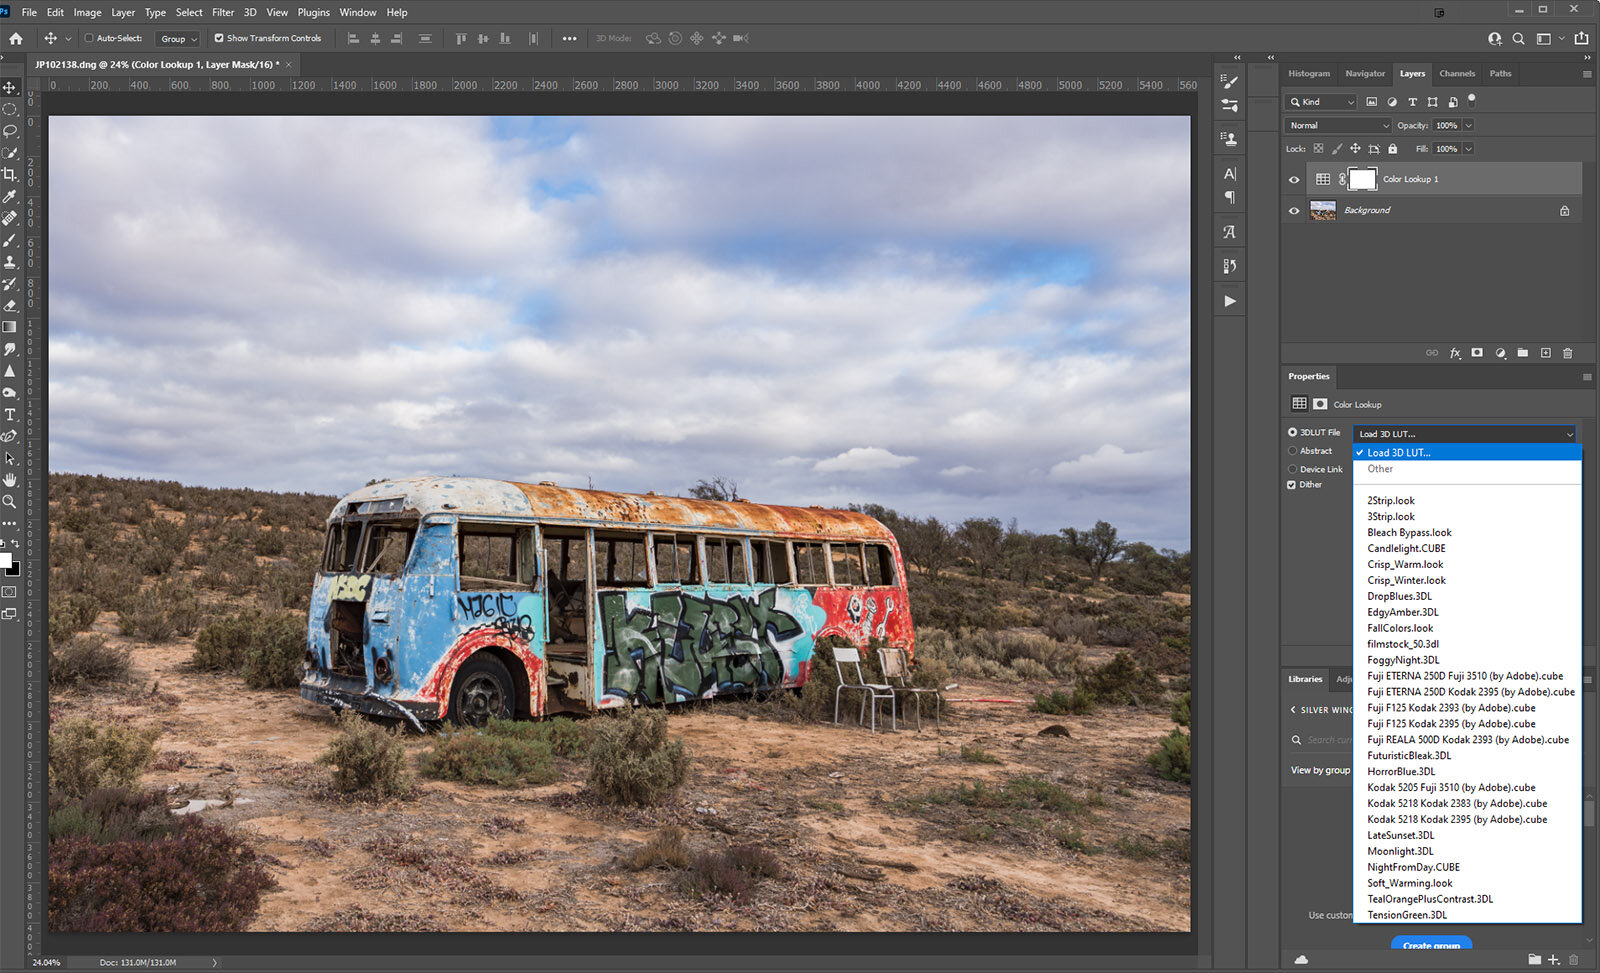
In Luminar AI they are found in the Mood tool in the Creative Panel [left] and in Adobe Photoshop they are found in the adjustment layer section as Color Lookup [right]. You can also buy them online and add them to your software too. You can even purchase a particular look from your favourite movie or TV show. I have found that the basic LUTs that come with Photoshop are great and I can mix and match them for my needs. I must admit, I have never bought any others.
Can they be altered?
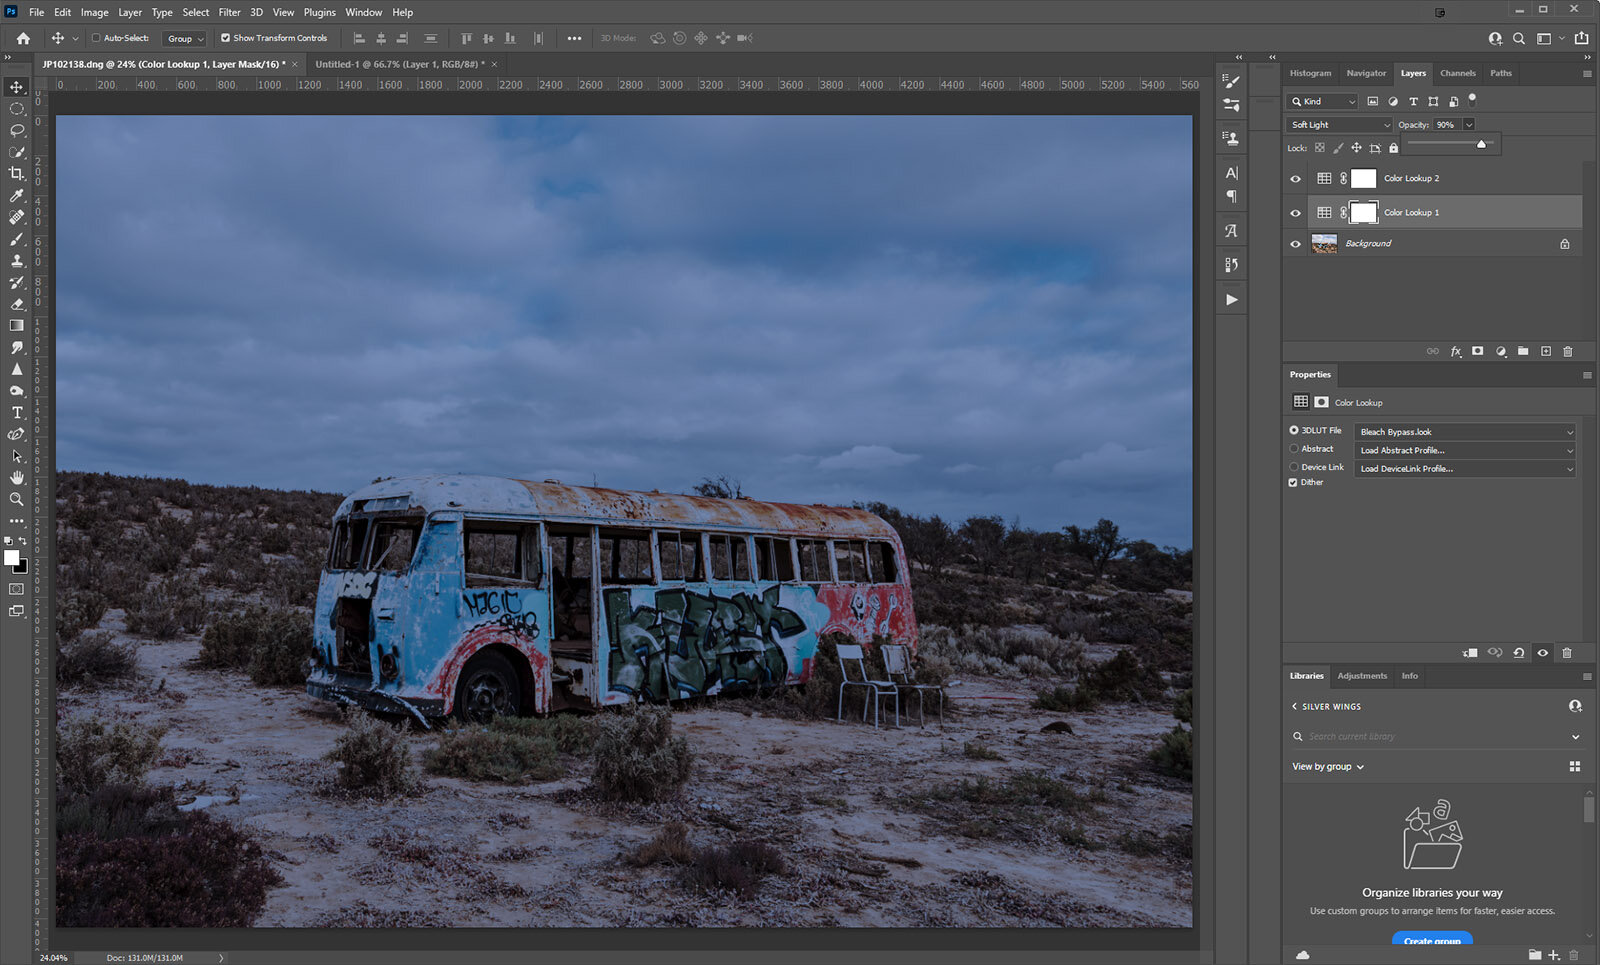
Not exactly, but you can change the blending mode and transparency of the LUTs if they are a separate layer, especially in Photoshop. You can also stack multiple LUTs to give you different looks.
Using LUTs in Luminar AI
In Luminar AI In Edit scroll down to the Creative Panel and select Mood. You will see a little arrow allowing for selections. Choose your favourite look and apply it. You can preview different LUTs by hovering over the name. Then once selected you can alter amount, contrast and saturation.
Using LUTs in Photoshop
I must confess I adore using LUTs in Photoshop. In the adjustment layer, select Color Lookup, then you can select which LUT you wish to use. You do need to actually select it to see it, but they can easily be changed for another LUT.
The fact that you can add multiple LUTs on different layers, alter the blend mode and the opacity is a fantastic plus. You can even add a layer mask if you wish to. On the image above I used Bleached Bypass LUT on Soft Light blend mode at 90% and then Nigh from Day LUT at normal blend mode at 85%. Quick easy and makes such a difference.
These can be also be terrific for adding color, tone and contrast to portraits and so much more. So now you know exactly what LUTs are, consider using them in your next editing session.
