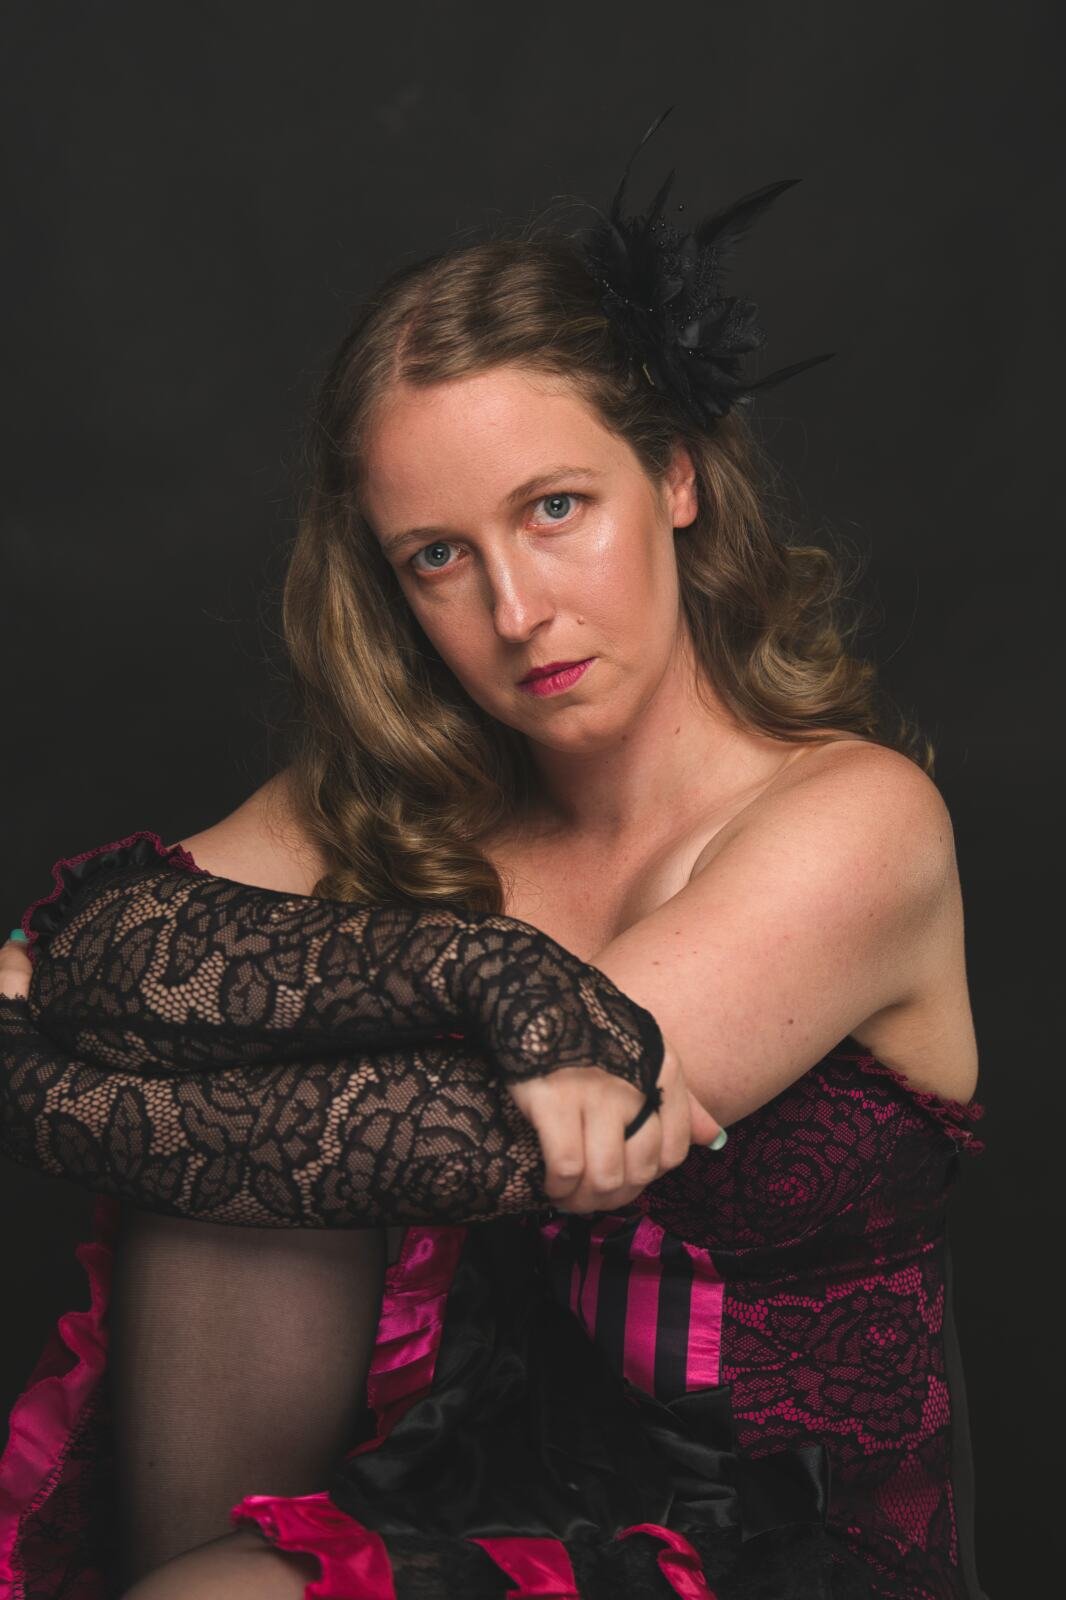

Dramatic portraits made easy with Luminar Neo
Take your images from drab to fab quickly in Luminar Neo. A few deft changes and some AI (artificial intelligence) enhancements and you’re good to go in mere minutes. Which is brilliant for someone who doesn’t want to spend their days editing. So if the shoot is more important than the edit, check out these simple edits

The edits panel in Luminar Neo
Stick to the basics
Once you import your image or indeed the entire folder, I skipped the Presets. They can be fun to play with, but it’s a bit like going down the rabbit hole. Once you start playing it can be difficult to stop. I went straight to the Edit panel. First stop was the crop tool. I let the Crop AI do its thing and then slightly adjusted it to my liking.
I suggest using EnhanceAI, then FaceAI. If you need to remove flyaway hairs or marks try the Erase tool. Just go slowly at first, remove a few strands and then click Erase. If you have dust or sensor spots (or even powerlines in the background) you can use the Remove Dust or Powerlines buttons.
Depending on how dramatic you want your image playing with Supercontrast, Glow, Mystical, and High Key can do wonders, just remember to keep your adjustments soft and believable.
Improving skin tone and form
The FaceAI, SkinAI and BodyAI can allow you to correct skin tone, shine and shape, as well as adjust the lighting to the face. The BodyAI allows you to slim down various areas. You can mask in and out various parts of your image as well. There are drop-down menus in FaceAI for Eyes and Mouth to add even more control elements.

FaceAI in Luminar Neo
Finishing it all off
Once you are pretty happy with any of the edits and honestly it probably took longer to read all this, than the actual edit, you can revisit any panel by jumping over to the edit panel. Add a little Mood and I suggest playing with some basic ones, but then dropping the opacity for a truly unique look.
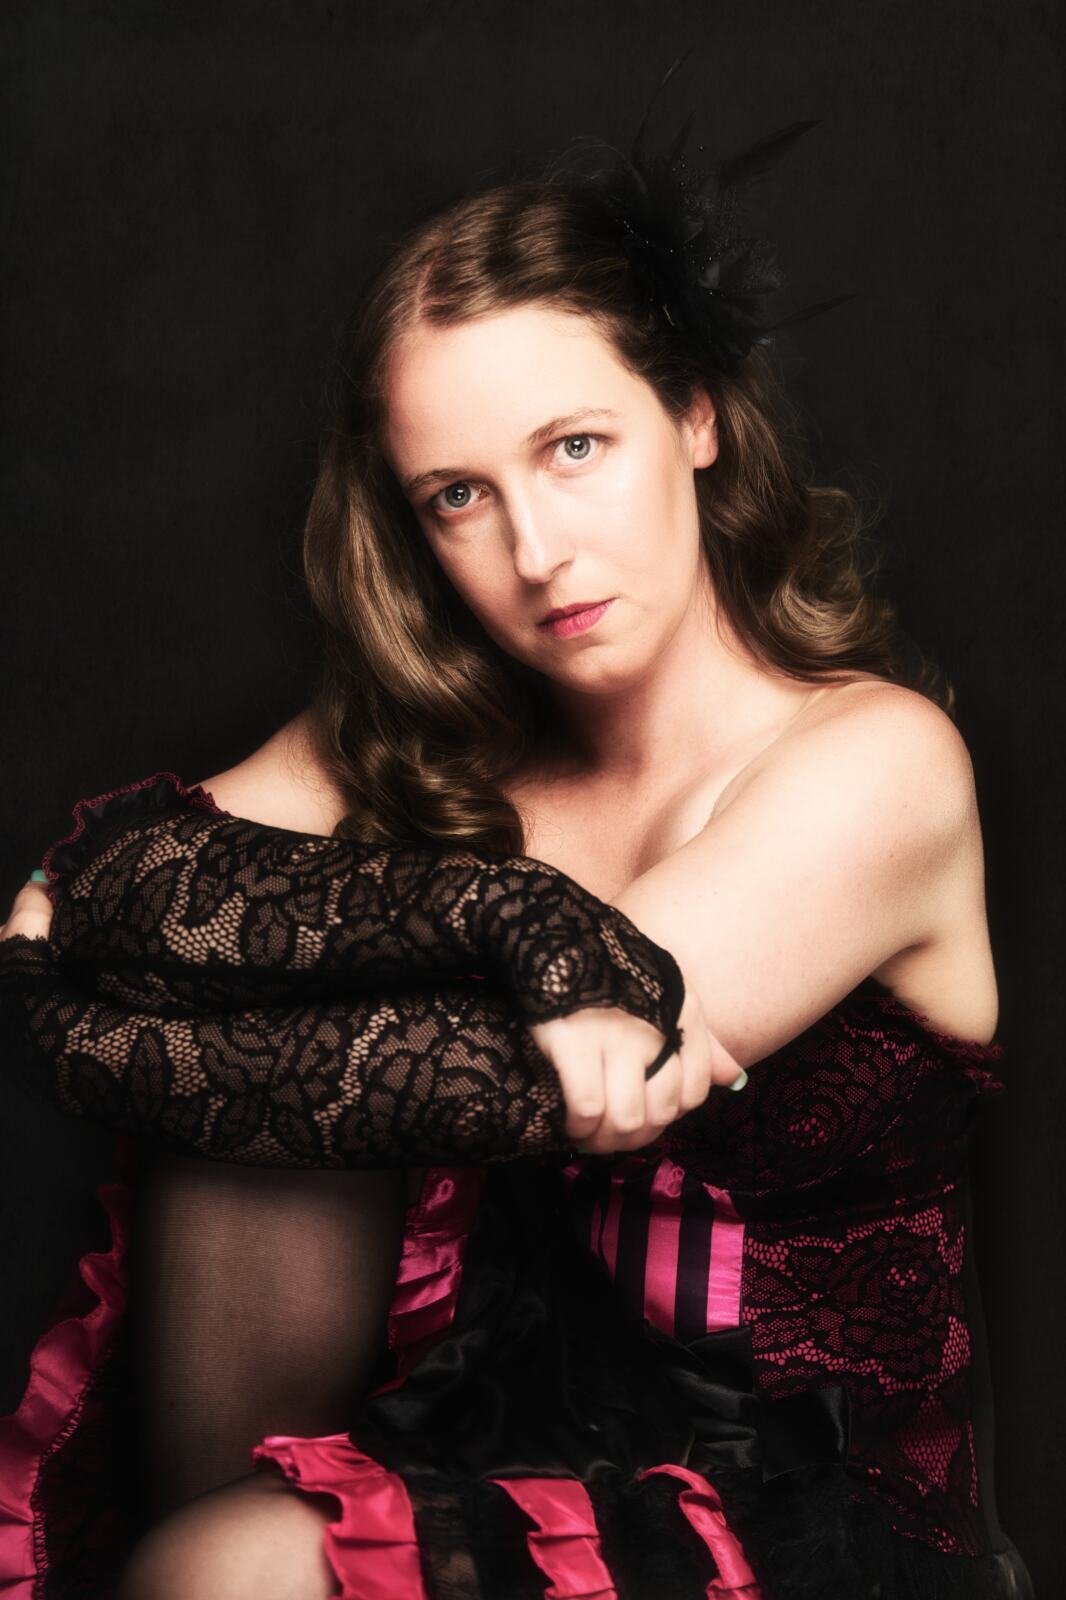
The final image
Soft, luminous and dramatic, and the lighting elements make it look painterly, especially when compared to the original image. Don’t forget if you really love your edit and want to use it again, drop down to the bottom of the edit panel and click Actions, you can then save it as your very own Preset to use again and again.